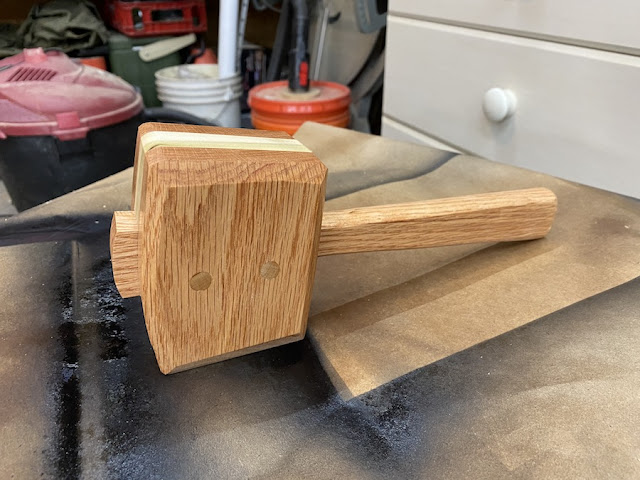
I've seen many videos that suggest a wooden mallet is essential to a woodshop. While that may be the case, I've made it so far without one. On this day, I decided to make one.
I set out to make this mallet from a piece of poplar I had. I realize poplar is probably the softest "hardwood" there is, and it's probably not the best thing to use for a mallet, however, this project is my first attempt, and I wanted to use what I already have....a small piece that isn't planned for something else. If I really like the way it turns out, I'll likely make another out of maple or something similar.For this build, I remembered seeing a pattern from Steve Good. You can download the pattern here. If you're unfamiliar with Steve Good, you're likely unfamiliar with scroll saw work. He has tons of patterns available for free, and I would consider him the premier place on the web to go for information concerning the scroll saw hobby.
As the plans suggest, I covered my board in painter's tape before gluing the pattern cut-out's down with spray adhesive. I first laid the cut-outs on the board to see how long the board needed to be, and cut it to length accordingly.
Steve's plans are made to use a scroll saw to cut these pieces out. As he commented, you don't see a scroll saw used in many plans to build one of these, but why not? I used my scroll saw to cut out all but the handle - it's long and fairly straight. The band saw was so much faster for that.
One option you have when making this mallet, is whether to hollow out a couple of pockets on the inside of the tool, to fill with lead and weigh it down. I've decided to do this. If I later decide it's too heavy, I'll know better next time!
Once I had each piece cut out, I started gluing up the 'head' of the mallet. The two center pieces on one of the outside pieces. Obviously, I'll want to get everything sanded and smoothed out as best I can before putting the handle on, and finishing the glue up. This is where things went south.
After gluing the first few pieces and clamping them up, I took the handle I had cut out over to the router to round over the edges. Unfortunately, the butt end of the handle splintered on the router. And it splintered enough so, that there wasn't much reason to try and salvage it. Even if I could, I already knew I needed a harder material to work with. So, I decided to scrap what I had done so far, and start over using a red oak board that I had. I was saving it for another project, but that's ok.
This time around, I cut all the pieces out on the band saw. That only took a couple of minutes. I decided to still use poplar on the two center pieces, and oak everywhere else. This will give the finished mallet, a great two tone look. With my scroll saw, I hollowed out the the middle of the center pieces, and filled with some old bb's that I had.I was much more careful this time with the handle. The truth is, on a smaller piece like this, the router makes me a little nervous. I think it probably has more potential for hurting you than most of the other tools in the shop. I'm well aware of the correct ways to practice safety, and hold the work piece securely, however, that thing spins FAST! I try to be very aware of every move I make when using it.
After getting the edges of the handle rounded over, I placed the last piece of the head over the bb's, and clamped it together, being careful to line everything up as good as I possibly could. The goal here is to sand down all the sides of the head to a super smooth surface before installing the handle. The reason for this is because the rounded edge will have the handle protruding slightly, and the handle sticking out of the opposite side. This will make it impossible to sand those sides as effectively once the whole thing is glued up.
Once I had those edges sanded down, it was time to glue it up. So I put the handle in place, being as precise as I could to have the top end protruding at just the right amount, and glued the other piece of the head on the mallet. I clamped every thing in place, and decided to let the glue dry over night before doing anything else.


No comments:
Post a Comment